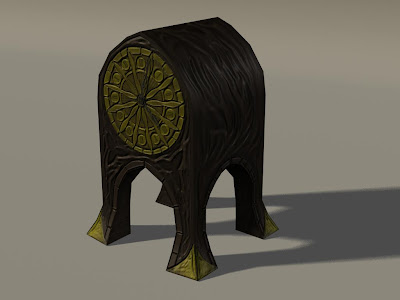
I found a really interesting Normal Mapping tool called Ndo
1. But first I need to change the clock hand material to a Lambert because the transparent areas were reflecting light. I then positioned the hands on the clocks face.
2. First stage (optional) was to change it into black and white by using the black and white tool or Hue/Saturation.
3. I then tampered with the exposure tool (this maybe a mistake but it’s all experimental). I had already installed it into Photoshop so it should show up in the macro section. I then press play and bam! It was turned into a normal map and a menu popped up.
4. This is what it looked like. I’m extremely new at this software so bare with me. The menu is there to change the normal map to whatever normal map you like (It’s just a matter of learning by trial and error).
5. I clicked “Save” and experimented but chose not to close down the window, just in case I was not happy with the results.
6. I then went to Maya to try on the normal map to see what’s it like and continued by going into the bump mapping option in the material menu and pressed “File” to search for the normal map.
Ahhh! Not happy with results. It seems to have picked up a large amount of the wood grain in my texture and where I had pen marked in the textures it picked up every stroke of the brush. (trial and error)
7. When in doubt look online! I found a handy website that tells me the function of the Ndo menu. I found the function “Make sculpt layer” I was impressed. I could fully customise the normal map to my liking and learnt to smooth out the normals so it didn’t get that nasty sketch look. I felt at home using the Photoshop brushes and tools to just hand paint what I want to stand out. It’s slowly coming along but unfortunately time is a major factor for hand drawn art. But it gets results in a render.
8. This is what it looks like coming out of “Make sculpt layer” and teaching me on how the normal map is formed.
Out of sculpt mode into the Ndo menu, save and then render it in Maya for the result.
9. The clock face was a big challenge and after all this hard work I’m still not totally happy with it. I might tackle this later because I am having trouble mastering the Ndo techniques. Taking a personal note* I should have gone for a simpler clock face design…
10. I changed the martial of the clock back into Blin and kept on rendering it to get a good polished look.
 |
| Image size mess up! |
11. Went back to normal Mapping and applied the same technique of hand drawing with the pressure brush and smoothing it with the blur tool after. In the screen shot it shows the clock in sculpt mode and then back into normal menu.
12. I found that I could copy my colour texture above the sculpt layer and then overlay and turn down opacity to be a guideline for normal mapping.
13. It was then time to move on to the feet and side arches and try and get them just right. I applied a 100 opacity brush on the arch bricks and then erased it so it didn’t stick out too much.
Render scene and final touches were going to be carried out next but time was of the essence and I might not be able to do it as I really don’t think I have the time to do the other two for my project of self discovery.


No comments:
Post a Comment